craftsman 921 air compressor manual
Craftsman 921 Air Compressor Manual: A Comprehensive Guide
This guide details the Craftsman 921 series, covering safety, operation, maintenance, and repair – including models 921.164710, 921;152100, and 921.166360.
The Craftsman 921 series air compressors represent a popular choice for both DIY enthusiasts and professionals needing reliable compressed air solutions. These compressors, including models like the 921.164710, are known for their versatility and durability, powering a wide range of tools for tasks from inflating tires to operating nail guns.
This series typically features both oil-free and oil-lubricated options, with tank sizes commonly around 26 gallons, offering a balance between portability and runtime. Understanding the specific model number is crucial, as variations exist in horsepower (often 1.5 HP) and pump type.
A comprehensive manual is essential for safe and efficient operation, covering everything from initial setup to troubleshooting common issues. Accessing the correct manual, often available in PDF format online, ensures optimal performance and longevity of your Craftsman 921 compressor.

Understanding Model Numbers: 921.164710 & Variations
Craftsman 921 model numbers, like 921.164710, are key to identifying specific compressor features and accessing the correct documentation. Variations within the 921 series often relate to tank capacity, pump lubrication (oil-free vs. oil-lubricated), and horsepower. For instance, 921.152100 represents a 5-gallon, 1HP oil-lubricated model, while 921.166360 is a 5-gallon, 1HP oil-lubricated direct drive compressor.
The manual associated with 921.164710 specifically details a 26-gallon, 1.5 HP oil-free direct drive unit.
Knowing your exact model number is vital when ordering replacement parts or consulting troubleshooting guides. Referencing the exploded view diagram in the manual, linked to your specific model, ensures compatibility and accurate repairs. Always verify the model number before purchasing any components.
Safety Precautions and Warnings
Prioritize safety when operating the Craftsman 921 air compressor. Always disconnect the power cord before performing any maintenance or repairs. Never exceed the maximum pressure rating of the tank or accessories. Wear appropriate eye and ear protection during operation, as compressed air can create noise and propel debris.
Inspect hoses and fittings for damage before each use. Do not attempt to modify the compressor in any way. Ensure adequate ventilation during operation, especially with oil-lubricated models.
The owner’s manual provides comprehensive safety instructions; read and understand them thoroughly before use to prevent injury and ensure safe operation.

Compressor Components and Features
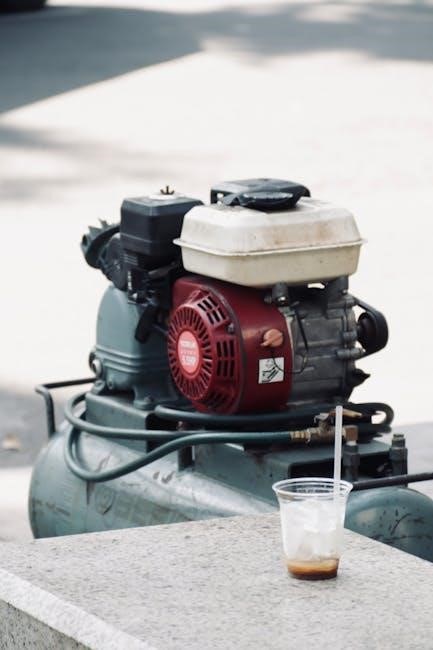
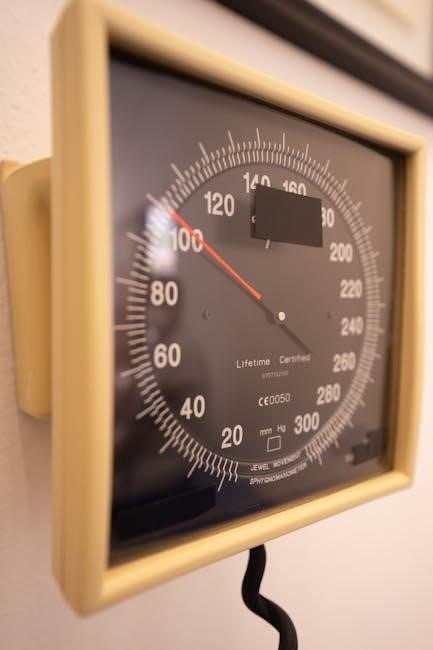
The Craftsman 921 features a 26-gallon tank, a 1.5 HP motor, and options for oil-free or oil-lubricated pumps, alongside a functional pressure switch.
Air Tank Specifications (26-Gallon)
The Craftsman 921 air compressor utilizes a 26-gallon air tank, providing substantial air storage for a variety of pneumatic tools and applications. This capacity balances portability with runtime, allowing for extended use before needing to refill. Constructed from durable steel, the tank is designed to withstand the pressures generated during operation, ensuring long-term reliability and safety.
Regular draining of the tank is crucial to prevent corrosion and maintain air quality, as moisture can accumulate during use. The tank’s maximum pressure rating is clearly indicated on the unit and should never be exceeded. Proper tank maintenance, including periodic inspection for rust or damage, contributes significantly to the overall lifespan and performance of the Craftsman 921 compressor.
Motor Specifications (1.5 HP)
The Craftsman 921 air compressor is equipped with a 1.5 horsepower (HP) motor, delivering sufficient power for most common workshop and DIY tasks. This motor is designed for reliable performance and efficient operation, providing the necessary airflow to drive a wide range of pneumatic tools. It’s a direct-drive motor, meaning it’s directly connected to the pump, simplifying the design and reducing energy loss.
The motor operates on standard 120V household current. Proper voltage and amperage are essential for optimal performance and to prevent damage. Overload protection is typically included to safeguard the motor from overheating. Regular inspection of the motor brushes (if applicable) and ensuring adequate ventilation are key maintenance practices for extending its lifespan.
Pump Type: Oil-Free vs. Oil-Lubricated
The Craftsman 921 series includes both oil-free and oil-lubricated compressor models. The 921.164710 specifically features an oil-free pump, minimizing maintenance as no oil changes are required. Oil-free pumps are convenient but generally have a shorter lifespan and can be louder than oil-lubricated counterparts.
Oil-lubricated pumps, found in models like the 921.152100, utilize oil to cool and lubricate internal components, resulting in quieter operation and increased durability. However, they necessitate regular oil changes and monitoring. Choosing between the two depends on usage frequency and maintenance preference. Oil-free is ideal for infrequent use, while oil-lubricated suits heavier, consistent workloads.
Pressure Switch Functionality
The pressure switch on the Craftsman 921 air compressor is crucial for automated operation. It monitors the air tank’s pressure, automatically starting the motor when pressure drops below a set lower limit and stopping it when the upper limit is reached. This maintains consistent air pressure for tools.
Typically, the switch has adjustable cut-in and cut-out pressure settings. Understanding these settings is vital for optimal performance. A malfunctioning pressure switch can cause the compressor to run continuously or fail to start. Replacement compatibility is important; ensure the new switch matches the original specifications for models like 921.164710. Proper function ensures safe and efficient operation.

Installation and Operation
Proper setup involves connecting to a suitable power source and ensuring adequate ventilation. Operating procedures include filling, draining, and regulating air pressure safely.
Initial Setup and Power Connection
Before initial use, carefully inspect the Craftsman 921 air compressor for any shipping damage. Ensure the compressor is placed on a stable, level surface with adequate ventilation to prevent overheating. Remove all packaging materials and verify all components are present according to the parts list.
Connect the compressor to a dedicated 120V, 60Hz power outlet, utilizing a properly grounded extension cord if necessary – ensure the cord gauge is appropriate for the compressor’s amperage. Avoid using outlets shared with other high-demand appliances. Before powering on, check the oil level (if applicable to your model) and ensure the drain valve is closed. Familiarize yourself with the location of the power switch and emergency stop mechanism for safe operation.
Operating Procedures: Filling and Draining the Tank
To fill the tank, ensure the power switch is ON and allow the compressor to run until the pressure switch cuts off, indicating the tank is pressurized to its maximum PSI. Monitor the pressure gauge during operation. Regularly draining the tank is crucial to prevent corrosion and maintain optimal performance.
To drain, turn off the compressor and disconnect the power supply. Locate the drain valve at the bottom of the tank and carefully open it to release accumulated moisture. Allow all water to drain completely before closing the valve. This should be done after each use or at least weekly, depending on humidity and usage frequency. Proper draining extends the life of the air compressor.
Air Pressure Regulation and Adjustment
The Craftsman 921 compressor features a regulator to adjust air pressure for various tools and applications. Locate the regulator knob, typically near the air outlet. Turning the knob clockwise increases pressure, while counterclockwise decreases it; Always check the pressure gauge while adjusting to ensure the desired PSI is reached.
Before operating any air tool, verify its maximum pressure rating and set the compressor’s regulator accordingly. Never exceed the tool’s recommended pressure. Regularly inspect the regulator for leaks or damage. Proper pressure regulation optimizes tool performance and prevents potential hazards. Consistent monitoring ensures safe and efficient operation.
Maintenance and Troubleshooting
Regular upkeep, like filter cleaning and oil changes (if applicable), ensures optimal performance. Addressing issues like low pressure or leaks promptly extends the compressor’s lifespan.
Routine Maintenance Schedule
Maintaining your Craftsman 921 air compressor is crucial for longevity and performance. After each use, drain the tank completely to prevent rust and corrosion. Regularly – approximately every 50 hours of operation – inspect the air filter and clean or replace it as needed. For oil-lubricated models, change the oil every 300 hours, or annually, whichever comes first.
Check air hoses and fittings for leaks or damage before each use. Inspect the pressure switch for proper functionality. Periodically examine the safety valve to ensure it’s not stuck or corroded. A consistent maintenance schedule, following the owner’s manual guidelines, will minimize downtime and maximize the compressor’s efficiency, ensuring reliable operation for years to come. Remember to disconnect the power supply before performing any maintenance tasks.
Oil Change Procedures (If Applicable)
For Craftsman 921 models requiring oil lubrication, begin by warming up the compressor briefly. Disconnect the power supply and locate the oil drain plug, typically at the bottom of the pump housing. Place a suitable container beneath the plug to catch the old oil. Carefully remove the plug and allow the oil to drain completely.
Reinstall the drain plug, ensuring it’s snug but not overtightened. Locate the oil fill port and add the recommended oil type and quantity, as specified in your owner’s manual. Check the oil level with the dipstick, if equipped. Properly dispose of the used oil at a designated recycling center. Regular oil changes maintain optimal pump lubrication and extend compressor life.
Air Filter Cleaning and Replacement
Maintaining a clean air filter is crucial for optimal compressor performance. Regularly inspect the air filter, located within the compressor’s intake housing. If the filter appears dirty or clogged, it needs attention. For foam filters, gently wash with warm, soapy water, rinse thoroughly, and allow to dry completely before reinstalling.
Paper filters should be tapped gently to dislodge loose debris; replacement is recommended when visibly soiled. A clogged filter restricts airflow, reducing efficiency and potentially damaging the pump. Refer to your owner’s manual for the correct filter part number. Replacing the air filter ensures clean air enters the compressor, prolonging its lifespan.
Troubleshooting Common Issues: No Pressure, Leaks
If the compressor fails to build pressure, first check the power supply and ensure the circuit breaker hasn’t tripped. Verify the pressure switch is functioning correctly – it may require replacement if faulty. For air leaks, listen carefully around fittings, hoses, and the tank. Tighten any loose connections, and inspect hoses for cracks or damage.
A soapy water solution can help pinpoint small leaks; bubbles will form at the leak source. If the tank itself is leaking, do not attempt repairs – professional assistance is required. Addressing these issues promptly prevents further damage and ensures safe operation.

Parts and Repair
Access exploded diagrams and comprehensive parts lists for Craftsman 921 models, aiding in identifying key replacement components and electrical connector details.
Exploded View Diagram and Parts List
The Craftsman 921 air compressor manual includes a detailed exploded view diagram, crucial for visualizing component assembly and disassembly during repairs. This diagram, alongside the accompanying parts list, allows users to precisely identify each part by reference number.
The parts list provides essential information, including part numbers (like E100084, E100086, and others referenced in available documentation), descriptions, and quantities needed for a complete assembly.
This resource is invaluable when ordering replacement parts, ensuring compatibility and simplifying the repair process. Accessing this information streamlines maintenance and minimizes downtime, allowing for efficient restoration of the compressor’s functionality. Proper use of the diagram and list prevents incorrect part ordering and ensures a successful repair.
Identifying Key Replacement Parts
When repairing a Craftsman 921 compressor, quickly identifying key replacement parts is essential. Common failures often involve the pressure switch, valves (specifically for models like 921.164710 Manual 1), and air filters. The manual’s parts list, referencing numbers like E100084 and E100086, is your primary resource.
Electrical connectors are also frequent points of failure, requiring careful inspection and potential replacement.
For models 921.152100 and 921.166360, pay close attention to the AC power plugs and sockets. Utilizing the exploded view diagram alongside the parts list ensures accurate identification and ordering of the correct components, minimizing delays and ensuring a successful repair.
Electrical Connector Information
The Craftsman 921 air compressor’s electrical system requires careful attention during maintenance and repair. Identifying the correct connectors is crucial for safe and effective operation. Inspect connectors for corrosion, damage, or loose wiring, as these can lead to malfunctions or electrical hazards.
Refer to the parts list (using codes like E100084) and exploded view diagram within the manual to pinpoint specific connector types.
Models 921.152100 and 921.166360 utilize standard AC power plugs and sockets; ensure compatibility when replacing. Always disconnect power before working on electrical components, and consult a qualified technician if unsure.
Valve Specifications (921.164710 Manual 1)
The valve assembly within the Craftsman 921.164710 is critical for pressure regulation and safe compressor operation. Manual 1 details specific valve components and their functions, including the pressure switch which controls air compression and motor activation.
Understanding valve specifications is essential for troubleshooting issues like inconsistent pressure or leaks. Replacement valves must match the original specifications to ensure compatibility and prevent damage.
Refer to the exploded view diagram and parts list for detailed valve component identification. Ensure the replacement valve is compatible with the pressure switch, and always test after installation.

Additional Resources
Find warranty details, related Craftsman models (921.152100, 921.166360), online manuals (PDF), and repair parts suppliers for assistance.
Warranty Information
Craftsman stands behind its air compressors with a commitment to quality and customer satisfaction. The warranty coverage for the 921 series, including models like the 921.164710, typically includes a one-year limited warranty against defects in materials and workmanship from the date of purchase. This warranty covers parts and labor required to repair or replace defective components.
However, the warranty does not cover damage resulting from misuse, abuse, improper maintenance, or normal wear and tear. It’s crucial to retain proof of purchase, such as the original receipt, to validate any warranty claims. For detailed warranty terms and conditions, and to initiate a claim, customers should visit the Craftsman website or contact their customer service department directly. Extended warranties may also be available for purchase.
Related Craftsman Compressor Models (921.152100, 921.166360)

Several Craftsman compressor models share similarities with the 921 series, offering alternative options based on specific needs. The 921.152100 is a 5-gallon, 1 HP oil-lubricated direct drive compressor, providing a smaller tank capacity for lighter-duty tasks. Conversely, the 921.166360 features a 5-gallon tank and 1 HP oil-lubricated direct drive motor, similar to the 921.152100 but potentially with slight variations in features or components.
Owners of these related models can often find overlapping parts compatibility and similar maintenance procedures. While the specific manual for each model is recommended, information from the 921.164710 manual can be a useful reference point. Always verify part numbers and specifications before making any repairs or replacements.
Finding Manuals Online (PDF Format)
Locating a digital copy of the Craftsman 921 air compressor manual in PDF format is often straightforward. Numerous websites archive owner’s manuals, including those for discontinued models like the 921.164710. A simple online search using the model number and “manual PDF” typically yields results. Sears’ website, and various parts supplier sites, frequently host downloadable manuals.
Ensure the PDF is legitimate and corresponds to your specific model variation. Manuals often contain crucial safety information, parts diagrams, and troubleshooting guides. Downloading and saving a digital copy provides convenient access for future reference, eliminating the need to locate a physical copy. Always prioritize official sources for accurate information.
Pressure Switch Replacement (Compatibility)
Replacing the pressure switch on a Craftsman 921 compressor requires careful attention to compatibility. While universal switches exist, verifying the correct voltage and port configuration is crucial for safe and effective operation. The 921.164710 model, and similar variants, often utilize a single-port pressure switch.
Confirm the new switch’s pressure range matches the compressor’s specifications (typically 125 PSI cut-out). Incorrect pressure settings can damage the compressor or connected tools. Cross-referencing part numbers with reputable suppliers ensures a proper fit. Always disconnect power before performing any electrical repairs, and consult the manual for detailed wiring diagrams.
Accessory Information (Air Hoses, Fittings)
Selecting appropriate accessories enhances the functionality of your Craftsman 921 air compressor. Standard ¼-inch NPT fittings are commonly used for air hoses and tools, ensuring compatibility with the compressor’s outlet. Consider hose length and material based on your application; rubber hoses offer flexibility, while braided hoses provide durability.
Quick-connect fittings simplify tool changes, and a regulator/filter combination minimizes moisture and contaminants reaching your pneumatic devices. Always check the pressure rating of accessories to match or exceed the compressor’s maximum output. Proper accessory selection maximizes performance and extends the lifespan of both the compressor and connected tools.
Repair Parts Suppliers
Sourcing replacement parts for your Craftsman 921 air compressor is crucial for maintaining its functionality. Several suppliers specialize in air compressor components, offering a wide range of parts, including valves, pressure switches, and pump components. Online retailers like Amazon and eBay frequently stock Craftsman parts, providing convenience and competitive pricing.
Dedicated parts websites, such as Mastertoolrepair, often carry specific parts for Craftsman models. Local hardware stores and Sears PartsDirect can also be valuable resources. When ordering, always verify the part number against your compressor’s model (e.g., 921.164710) to ensure compatibility and a successful repair.
Related Posts

how do you manually roll up a power window
Power window giving you trouble? Don’t panic! Our simple, step-by-step guide shows you how to manually roll up your car window like a pro. Get back on the road fast!
cosori pressure cooker manual
Lost your Cosori pressure cooker manual? No sweat! Find a downloadable PDF & get back to creating delicious, quick meals. Easy recipes & troubleshooting too! ✨

manual gearbox service
Don’t get stuck in gear! Find detailed manuals & expert tips for manual gearbox service. Keep your ride smooth – explore now at ShowLosAngeles!