
6r140 rebuild manual pdf
The 6R140 rebuild manual is a comprehensive guide designed for both professional technicians and DIY enthusiasts. It provides detailed instructions, diagrams, and torque specifications for a successful transmission overhaul. The manual covers disassembly, troubleshooting, and reassembly processes, ensuring a thorough understanding of the 6R140 transmission’s complex components.
Overview of the 6R140 Transmission
The 6R140 transmission is a six-speed automatic transmission designed for heavy-duty applications, introduced by Ford in 2011 for Super Duty trucks. It is paired with the 6.2L gas and 6.7L Power Stroke diesel engines, offering improved torque capacity and fuel efficiency. The transmission features Lepelletier toothed gearing, which enables efficient clutch and gear set management, requiring only five clutch sets for six forward gears. Its robust design includes a metallic powder carrier in the compounded gear set, enhancing durability. The 6R140 rebuild manual is essential for understanding and maintaining this complex transmission, providing detailed insights into its operation and rebuild process.
Importance of a Rebuild Manual for the 6R140
A rebuild manual for the 6R140 transmission is crucial for ensuring a successful and precise rebuild process. It provides detailed, step-by-step instructions tailored to the specific needs of this heavy-duty transmission. The manual covers essential topics such as disassembly, inspection, and reassembly, helping technicians avoid common pitfalls. It also includes critical information like torque specifications, fluid requirements, and diagnostic tips. Whether you’re a professional mechanic or a DIY enthusiast, the rebuild manual serves as an indispensable guide, ensuring the transmission operates smoothly and reliably after the rebuild. It helps prevent costly mistakes and guarantees optimal performance.

Understanding the 6R140 Transmission
The 6R140 is a heavy-duty, 6-speed automatic transmission designed for Ford trucks. It features advanced torque converter technology and robust gearsets for high-torque applications, ensuring reliable performance.
Design and Features of the 6R140
The 6R140 transmission is a 6-speed automatic designed for heavy-duty applications, featuring a robust gearset and advanced torque converter technology. It incorporates a one-piece aluminum case with a bellhousing, ensuring durability and reduced weight. The transmission includes a lock-up clutch for improved fuel efficiency and reduced heat generation. Its electronic controls enable precise shifting and adaptive learning for optimal performance. The 6R140 also features improved friction materials and optimized clutch pack designs for enhanced durability. These design elements make it suitable for high-torque engines, providing smooth power delivery and reliable operation under demanding conditions.
Applications of the 6R140 Transmission
The 6R140 transmission is widely used in Ford’s Super Duty trucks, including the F-250 and F-350 models, designed for heavy-duty towing and hauling. It is also found in other high-torque applications such as utility vehicles, commercial trucks, and motorhomes. The transmission’s robust design makes it ideal for demanding conditions, ensuring reliability and performance in vehicles requiring significant power delivery. Its application spans various industries where durability and strength are essential, making it a preferred choice for both on-road and off-road heavy-duty operations.
Technical Specifications of the 6R140
The 6R140 is a heavy-duty, 6-speed automatic transmission designed for high-torque applications. It features a gear ratio spread of 4.17:1 to 0.74:1, providing excellent low-end torque for towing and hauling. The transmission has a maximum torque capacity of up to 920 lb-ft, making it suitable for demanding environments. It utilizes advanced clutch packs and a robust planetary gear system for durability. The 6R140 also incorporates electronic controls for smooth shifting and precise torque management. Proper fluid capacity and pressure specifications are critical for optimal performance, ensuring reliable operation in both on-road and off-road conditions.

Tools and Equipment Required
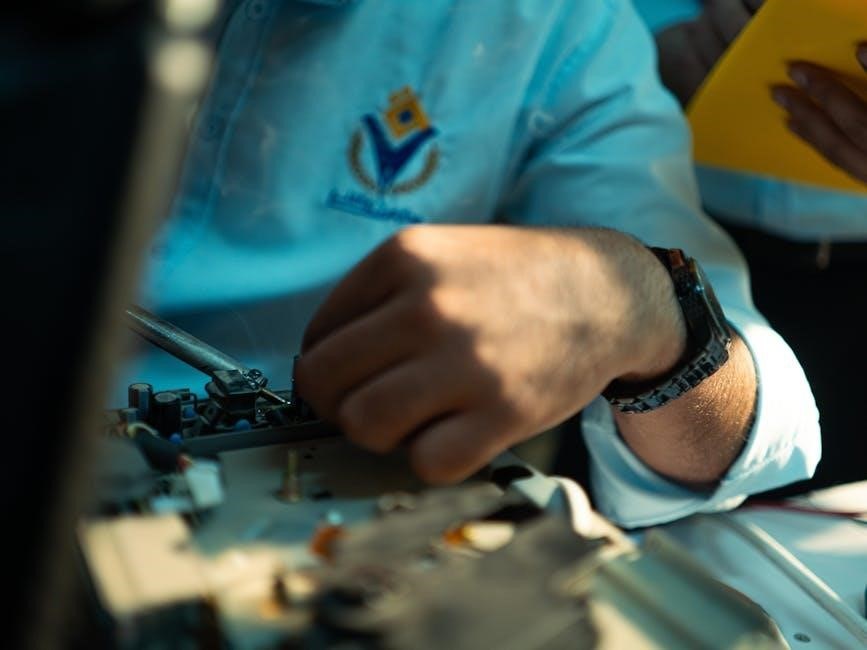
A 6R140 rebuild requires various tools, including a pressure gauge, dial indicator, torque wrench, bearing puller, snap ring pliers, piston compressor, transmission pan tool, seal installer, and parts washer.
Specialty Tools Needed for the Rebuild
The 6R140 rebuild requires specific tools to ensure accuracy and safety. A bearing puller is essential for removing pressed bearings without damage. A piston compressor helps collapse pistons during disassembly. Snap ring pliers are necessary for retaining rings. A dial indicator measures bearing endplay precisely. A transmission pan tool prevents damage when removing the pan. A seal installer ensures proper seating of seals. Lastly, a parts washer is crucial for cleaning components before reassembly. These tools are vital for a successful rebuild and preventing costly damage.
Basic Tools and Their Importance
Basic tools are fundamental for a successful 6R140 rebuild. A socket set is essential for removing bolts and nuts. Torque wrenches ensure proper tightening of fasteners. Pliers and punches help with retaining rings and small components. A set of screwdrivers, including Phillips and Torx, is needed for various screws. Wrenches, such as adjustable and box-end, are used for fittings and larger bolts. A work light provides clear visibility. A parts organizer keeps components tidy. Rags and solvents are crucial for cleaning. These tools are indispensable for efficiency and accuracy during the rebuild process.
Safety Precautions and Workshop Setup
Proper safety precautions are crucial when rebuilding the 6R140. Always wear safety glasses and gloves to protect against debris and sharp edges. Ensure the workspace is well-ventilated to avoid inhaling harmful fumes from cleaning solvents. A fire extinguisher should be nearby. Set up a sturdy workbench with a vice to secure the transmission; Use jack stands and supports to stabilize heavy components. Proper lighting is essential for visibility. Keep a parts organizer to prevent losing small components. Always follow proper lifting techniques to avoid injury. A clean, organized workspace reduces risks and ensures efficiency during the rebuild process.

Disassembly Process
The disassembly of the 6R140 transmission requires careful planning and organization. Start by removing the pan and filtering the fluid. Next, disconnect the electrical connectors and solenoid pack. Remove the valve body, followed by the torque converter and input shaft. Use specialized tools to extract the bearing retainer and planetary gearset. Document each step and label components for reassembly. Keep small parts organized to avoid misplacement. Follow the manual’s torque specifications for bolt removal. Ensure all components are cleaned and inspected before proceeding to the rebuild phase.
Step-by-Step Disassembly Instructions
Begin by removing the transmission pan and draining the fluid. Document the wiring harness and solenoid pack connections before disconnecting them. Remove the valve body, ensuring all linkage components are detached. Take out the torque converter bolts and carefully pull the converter away from the transmission. Use a bearing puller to remove the input shaft bearing. Label and organize all components as they are removed. Remove the planetary gearset and sun gear assembly, followed by the clutch packs and bands. Keep track of small parts like snaps and retaining rings. Clean each component thoroughly and inspect for wear or damage before proceeding.
Common Challenges During Disassembly
One of the most common challenges during disassembly is removing stuck components, such as the torque converter or clutch packs, which may be seized due to wear or debris. Specialized tools, like a bearing puller, may be required to safely remove these parts without causing damage. Additionally, the complexity of the valve body and planetary gear system can make disassembly confusing for novice rebuilders. Proper labeling and organization of small parts, such as retaining rings and snap clips, are crucial to avoid losing them. Lastly, ensuring all electrical connectors and solenoids are correctly documented before removal is essential for reassembly accuracy.
Inspecting Components for Damage
Inspecting components for damage is critical during a 6R140 rebuild. Start by examining planetary gears, bearings, and clutch packs for signs of wear, scoring, or cracks. Check the torque converter for damaged fins or excessive play. Look for debris in the valve body and solenoid pack, as contamination can lead to poor transmission performance. Inspect seals and gaskets for tears or hardening, which can cause leaks. Use a magnifying glass to spot micro-cracks in hard parts. Clean all components thoroughly before inspection to avoid missing hidden damage. Replace any questionable parts to ensure reliability and longevity of the transmission after rebuild.

Rebuild Process
The 6R140 rebuild process requires a structured approach, ensuring all components are cleaned and inspected thoroughly. Replace worn parts with those from a genuine rebuild kit. Follow precise torque specifications for reassembly to guarantee proper transmission function and longevity.
Obtaining the Right Rebuild Kit
To ensure a successful rebuild, you must obtain the correct 6R140 rebuild kit. These kits typically include gaskets, seals, bearings, and clutch packs. Check the supplier’s compatibility chart to confirm the kit matches your transmission’s specific year and application. High-quality kits from reputable manufacturers are essential for durability and performance. Avoid cheap alternatives, as they may lead to premature wear. Consult the manual for a detailed parts list to verify the kit’s contents. Additionally, ensure the kit includes any updated components for improved functionality. Buying from trusted sources guarantees authenticity and adherence to OEM specifications.
Replacing Gaskets and Seals
Replacing gaskets and seals is critical during the 6R140 rebuild to ensure leak-free performance and proper transmission function. These components are found in areas like the valve body, pan, and main case. Always use new gaskets and seals from the rebuild kit to avoid reusing worn-out parts. Clean all surfaces thoroughly before installation to ensure a proper seal. Apply a thin, even layer of sealant where specified, but avoid over-tightening, as this can damage the gaskets. Use a torque wrench to secure bolts to the recommended specifications. Inspect all surfaces for debris before reassembly to guarantee a leak-free rebuild.
Torque Specifications for Reassembly
Torque specifications are crucial for the proper reassembly of the 6R140 transmission. Each bolt and nut has specific torque requirements to ensure structural integrity and prevent damage. Begin with the main case bolts, typically torqued to 30-40 ft-lbs, and the valve body bolts at 10-15 ft-lbs. The pan bolts usually require 10-12 ft-lbs. Use a torque wrench for accuracy and follow the recommended sequence to avoid uneven stress. Over-tightening can lead to stripped threads or warped surfaces, while under-tightening may result in leaks or loose connections; Always refer to the official manual for precise values and patterns to ensure a reliable rebuild.
Troubleshooting Common Issues
Address common 6R140 issues like slipping gears, harsh shifting, and fluid leaks. Inspect solenoids, torque converters, and fluid systems for faults. Use diagnostic tools to pinpoint problems accurately.
Identifying Common Problems in the 6R140
The 6R140 transmission may experience issues such as slipping gears, harsh shifting, or fluid leaks. These problems often stem from worn clutch packs, low transmission fluid levels, or faulty solenoids. Other common issues include damaged gear sets, failed torque converters, and sensor malfunctions. Early detection is crucial to prevent major damage. Regular inspection of fluid condition, pressure testing, and scan tool diagnostics can help identify these problems. Addressing them promptly ensures optimal performance and longevity of the transmission. Always refer to the rebuild manual for specific diagnostic procedures and repair guidelines.
Diagnosing Transmission Faults
Diagnosing faults in the 6R140 transmission involves a combination of electronic and physical inspections. Start by using an OBD-II scanner to retrieve fault codes, which provide clues about issues like solenoid failures or pressure sensor malfunctions. Next, perform a visual inspection for signs of fluid contamination or leaks. Test drives can help identify symptoms like slipping or erratic shifting. Use a pressure test kit to verify hydraulic pressure levels. Additionally, scan tools specific to the 6R140 can monitor real-time data, such as clutch pack apply pressures and torque converter engagement. Always consult the rebuild manual for detailed diagnostic procedures and code interpretations.
Repairing vs. Replacing Damaged Components
When rebuilding the 6R140, deciding whether to repair or replace damaged components is critical. Repairing can be cost-effective for minor issues, such as resurfacing a worn clutch pack or refinishing a bearing. However, severely damaged parts, like a cracked input shaft or worn-out planetary gears, should be replaced to ensure reliability. Always compare the cost of repairs versus new components, as replacing is often more economical in the long run. Use the rebuild manual to assess the condition of each part and determine the best course of action. Prioritize OEM or high-quality aftermarket parts for optimal performance and durability.

Reassembly and Testing
Reassembly requires meticulous attention to torque specifications and component alignment. Follow manual instructions precisely to ensure proper fitment. Testing involves checking for leaks and smooth operation.
Reassembly Procedure
Reassembly begins with installing the main components, ensuring all parts are clean and lubricated. Follow the manual’s torque specifications for each bolt and connector. Start with the transmission case, then reinstall the gear sets, bearings, and seals in the correct order. Use specialized tools for pressing bearings and seals to avoid damage. Align the planetary gearset and ensure proper engagement of the clutch packs. Reattach the valve body and solenoid pack, making sure all electrical connections are secure. Finally, refill the transmission fluid and bleed the system to remove air pockets before testing.
Testing the Transmission After Rebuild
After reassembly, test the transmission to ensure proper functionality. Start with a stall test to check for slips or unusual noises. Gradually increase RPM while in gear to verify smooth engagement. Take the vehicle for a test drive, shifting through all gears to assess performance under load. Monitor transmission temperature and fluid levels during operation. Use diagnostic tools to scan for fault codes or pressure issues. Ensure the torque converter locks up correctly and the transmission shifts smoothly at various speeds. Any unexpected behavior or leaks should be addressed immediately before finalizing the rebuild.
Ensuring Proper Transmission Functionality
To confirm the transmission operates correctly, perform a series of functional tests. Check for smooth shifting between gears, proper torque converter engagement, and consistent pressure across all ranges. Monitor the transmission control module (TCM) for error codes using a diagnostic scanner. Verify that all solenoids and sensors are functioning as intended. Test under varying load conditions, including acceleration and deceleration, to ensure seamless operation. Address any irregularities promptly, as overlooked issues can lead to premature wear or failure. Proper functionality ensures reliability, performance, and longevity of the 6R140 transmission after the rebuild.

Maintenance and Service Tips
Regular fluid checks, filter replacements, and pan gasket inspections are essential. Replace the transmission fluid every 15,000 to 30,000 miles for optimal performance. Avoid flushing the torque converter, as it can damage internal components. Always use genuine Ford parts for replacements to ensure compatibility and longevity. Proper maintenance prevents premature wear and ensures smooth operation. Schedule regular servicing to identify and address potential issues early. This helps maintain the transmission’s reliability and extends its lifespan significantly.
Regular Maintenance for the 6R140
Regular maintenance is crucial for the longevity and performance of the 6R140 transmission. Check the transmission fluid level monthly and replace it every 30,000 miles. Clean the transmission pan every 15,000 miles to remove debris. Inspect and replace the fluid filter during each service interval. Monitor the pan gasket and cooler lines for leaks. Ensure the transmission cooler is functioning properly to prevent overheating. Check the torque converter for proper engagement and alignment. Regular maintenance prevents premature wear and ensures smooth operation. Always use genuine Ford parts for replacements to maintain compatibility and longevity.
Fluid Replacement and Filter Service
Fluid replacement is essential for maintaining the 6R140 transmission’s health. Replace the transmission fluid every 30,000 miles using Mercon LV or equivalent. Use a drain pan to catch old fluid and ensure the vehicle is on level ground. Inspect the fluid for contamination or discoloration. Replace the transmission filter every 15,000 to 30,000 miles. Clean or replace the filter bracket and pan gasket to prevent leaks. After refilling, check for proper fluid level using the dipstick. Torque the pan bolts to the specified value to avoid damage. Proper fluid service ensures smooth gear engagement and prevents internal wear.
Preventative Measures to Avoid Future Issues
Regular inspections of the 6R140 transmission are crucial to prevent future issues. Check for fluid leaks, worn seals, and damaged components during routine maintenance. Monitor transmission temperature, as excessive heat can lead to premature wear. Avoid aggressive driving habits, such as rapid acceleration or frequent towing, which can stress the transmission. Use high-quality replacement parts to ensure durability. Keep the transmission software updated, as newer firmware may improve performance and resolve potential issues. Address minor problems promptly to prevent them from escalating into major repairs. Proper preventative care extends the lifespan of the 6R140 and maintains optimal performance.

Electronic Controls and Diagnostics
The 6R140 transmission relies on advanced electronic controls for smooth operation. Proper diagnostics using scan tools and software updates ensure optimal performance and fault detection.
Understanding Electronic Controls
The 6R140 transmission utilizes advanced electronic controls to ensure precise shifting and torque management. These controls are managed by a Transmission Control Module (TCM), which monitors engine speed, load, and other parameters. Solenoids and sensors work together to regulate fluid pressure and gear engagement. Adaptive learning technology allows the TCM to adjust shifting patterns based on driving habits. This system provides real-time monitoring and optimization, ensuring smooth operation under varying conditions. Understanding these electronic controls is essential for troubleshooting and maintaining proper transmission functionality during a rebuild. Proper calibration and testing are critical to restore factory-like performance and reliability.
Using Diagnostic Tools for the 6R140
Diagnostic tools are essential for identifying and resolving issues in the 6R140 transmission. A scan tool, such as Ford’s Integrated Diagnostic System (IDS) or aftermarket equivalents, allows technicians to read fault codes, monitor live data, and perform system tests. Pressure test kits help verify hydraulic system integrity, while multimeters can troubleshoot electrical circuits. Software tools enable updates to the Transmission Control Module (TCM) for optimal performance. These tools are critical for pinpointing problems during a rebuild and ensuring proper function post-repair. Regular use of diagnostic tools helps maintain reliability and prevent future issues. Always follow the manufacturer’s guidelines for accurate diagnostics. Proper tool usage ensures precise repairs and avoids costly mistakes. Regular diagnostics are key to maintaining transmission health and performance. By leveraging these tools, technicians can restore the 6R140 to its original functionality.
Updating Transmission Software
Updating the 6R140 transmission software is crucial for optimal performance and addressing any calibration issues. Ford’s Integrated Diagnostic System (IDS) or similar tools are used to download and install the latest software from Ford’s database. Ensure the vehicle is connected to a battery maintainer to prevent power loss during the update. After downloading, follow the on-screen instructions to flash the Transmission Control Module (TCM). Always use genuine Ford tools and software to avoid compatibility issues. Regular software updates ensure the transmission operates with the latest calibrations, improving reliability and functionality. This step is vital for maintaining proper transmission operation and addressing any manufacturer-identified improvements.

Parts and Accessories Guide
This section provides essential information on selecting the right parts and accessories for your 6R140 rebuild, ensuring compatibility and quality for optimal transmission performance and longevity.
Recommended Rebuild Kits and Suppliers
Choosing the right rebuild kit and suppliers is crucial for a successful 6R140 transmission rebuild. High-quality kits ensure longevity and performance. Reputable suppliers like ATP, BD, and Monster Transmission offer comprehensive kits tailored for the 6R140. These kits typically include gaskets, seals, bearings, and clutch packs. Always verify the supplier’s reputation and read reviews to avoid low-quality components. Additionally, consider purchasing a kit that includes a new torque converter, as many suppliers like Precision and Goerend offer these as part of their packages. Ensure the kit aligns with your transmission’s specifications; Updating to the latest kit versions can also resolve known issues and improve reliability.
Aftermarket Parts and Upgrades
Aftermarket parts and upgrades can significantly enhance the performance and durability of your 6R140 transmission. Popular upgrades include heavy-duty torque converters, billet input shafts, and reinforced clutch packs. Companies like BD Diesel and ATS offer high-performance components designed to handle increased stress from towing or high-horsepower applications. Upgrading the valve body or adding a transmission cooler can also improve shifting smoothness and heat management. When selecting aftermarket parts, ensure compatibility with your transmission’s specifications and consider professional installation for optimal results. These upgrades not only extend the life of your transmission but also improve overall vehicle performance.
Genuine vs. Aftermarket Parts
Genuine parts are manufactured by Ford, ensuring precise fitment and reliability for the 6R140 rebuild. They come with a warranty and are designed to meet OEM specifications, making them a safe choice for critical components. Aftermarket parts, while often more affordable, may vary in quality and compatibility. Reputable aftermarket brands can offer high-quality alternatives, but caution is needed to avoid inferior products. For rebuilding, genuine parts are recommended for critical components like clutch packs and bearings, while aftermarket parts can be considered for less stressed items. This balance ensures reliability and cost-effectiveness during the rebuild process.
Rebuilding the 6R140 transmission demands precision, patience, and adherence to this manual. Proper techniques ensure longevity and optimal performance, making the effort worthwhile for enthusiasts and professionals alike.
Final Thoughts on the Rebuild Process
Rebuilding the 6R140 transmission is a complex yet rewarding process that requires meticulous attention to detail. By following this manual, enthusiasts and professionals alike can restore their transmission to optimal performance. Proper techniques, such as adhering to torque specifications and using the right tools, are crucial for ensuring reliability. Testing the transmission thoroughly after reassembly is essential to confirm functionality. Regular maintenance and fluid changes will extend the lifespan of the rebuild; Whether you’re a seasoned mechanic or a DIY novice, completing this project successfully can save costs and provide a sense of accomplishment. Stay proactive with future servicing.
Importance of Proper Rebuild Techniques
Proper rebuild techniques are critical for ensuring the longevity and performance of the 6R140 transmission. Using precise measurements, adhering to torque specifications, and following step-by-step instructions minimize the risk of component failure. Improper assembly can lead to premature wear, leaks, or even catastrophic damage. Special attention must be paid to gasket sealing, bearing installation, and clutch pack alignment. A well-executed rebuild restores transmission efficiency, smooth shifting, and overall vehicle performance. Cutting corners or overlooking details can result in costly repairs down the line. Mastery of these techniques ensures reliability and optimal functionality for years to come.
Encouragement for Successful Rebuild
Completing a 6R140 rebuild is a significant accomplishment that restores your transmission to peak performance. By following the manual’s guidance, you’ll gain hands-on experience and a deeper understanding of complex systems. This process not only saves money but also empowers you with the skills to tackle future repairs confidently. A successful rebuild ensures improved transmission longevity, smoother shifting, and enhanced vehicle reliability. Embrace the challenge, stay meticulous, and celebrate your ability to breathe new life into your transmission. Mastery of this process is a testament to your technical skills and dedication.
Appendix
The appendix provides additional resources, including a glossary of terms, FAQs, and torque specifications, to assist with troubleshooting and ensure an accurate rebuild process.
Additional Resources and References
For further guidance, refer to the official Ford 6R140 rebuild manual or reputable transmission repair guides. Online forums like Ford Truck Enthusiasts and transmission specialist websites offer valuable insights. PDF resources from trusted suppliers, such as Monster Transmission and ATP, provide detailed diagrams and torque specifications. Additionally, video tutorials on YouTube and technical bulletins from aftermarket brands can supplement your knowledge. Always cross-reference information to ensure accuracy. Genuine Ford service manuals and OEM part catalogs are essential for authenticity. These resources will help you navigate complex procedures and ensure a successful rebuild process. Proper research is key to avoiding costly mistakes.
Glossary of Transmission Terms
Planetary Gear Set: A set of gears that provide different gear ratios for smooth power transfer. Torque Converter: A fluid-filled component that transfers engine power to the transmission. Solenoid Pack: Controls hydraulic pressure for gear shifts. Clutch Pack: Friction plates that engage gears. Pressure Plate: Applies force to clutch packs. Seal Kits: Prevent fluid leaks. Input Shaft: Transfers torque from the engine. Output Shaft: Sends power to the drivetrain. ATF (Automatic Transmission Fluid): Lubricates and cools the transmission. Understanding these terms is crucial for a successful rebuild.
Frequently Asked Questions (FAQs)
Q: Why is rebuilding the 6R140 transmission necessary? A: Rebuilding ensures optimal performance, addresses wear, and prevents costly failures. Q: What tools are required? A: Specialty tools like a torque wrench and bearing puller are essential. Q: Can I rebuild the transmission myself? A: Yes, with proper guidance and experience. Q: How long does the process take? A: It varies, but expect several days for disassembly, inspection, and reassembly. Q: What are common mistakes to avoid? A: Incorrect torque specs, improper sealing, and ignoring inspection steps. Q: Where can I find reliable parts? A: Use genuine or trusted aftermarket suppliers. Always follow the manual for best results.
Related Posts

how do you manually roll up a power window
Power window giving you trouble? Don’t panic! Our simple, step-by-step guide shows you how to manually roll up your car window like a pro. Get back on the road fast!
cosori pressure cooker manual
Lost your Cosori pressure cooker manual? No sweat! Find a downloadable PDF & get back to creating delicious, quick meals. Easy recipes & troubleshooting too! ✨

craftsman 921 air compressor manual
Lost your Craftsman 921 air compressor manual? Don’t sweat it! Download a free PDF guide right here and get back to work. Easy access & instant help!